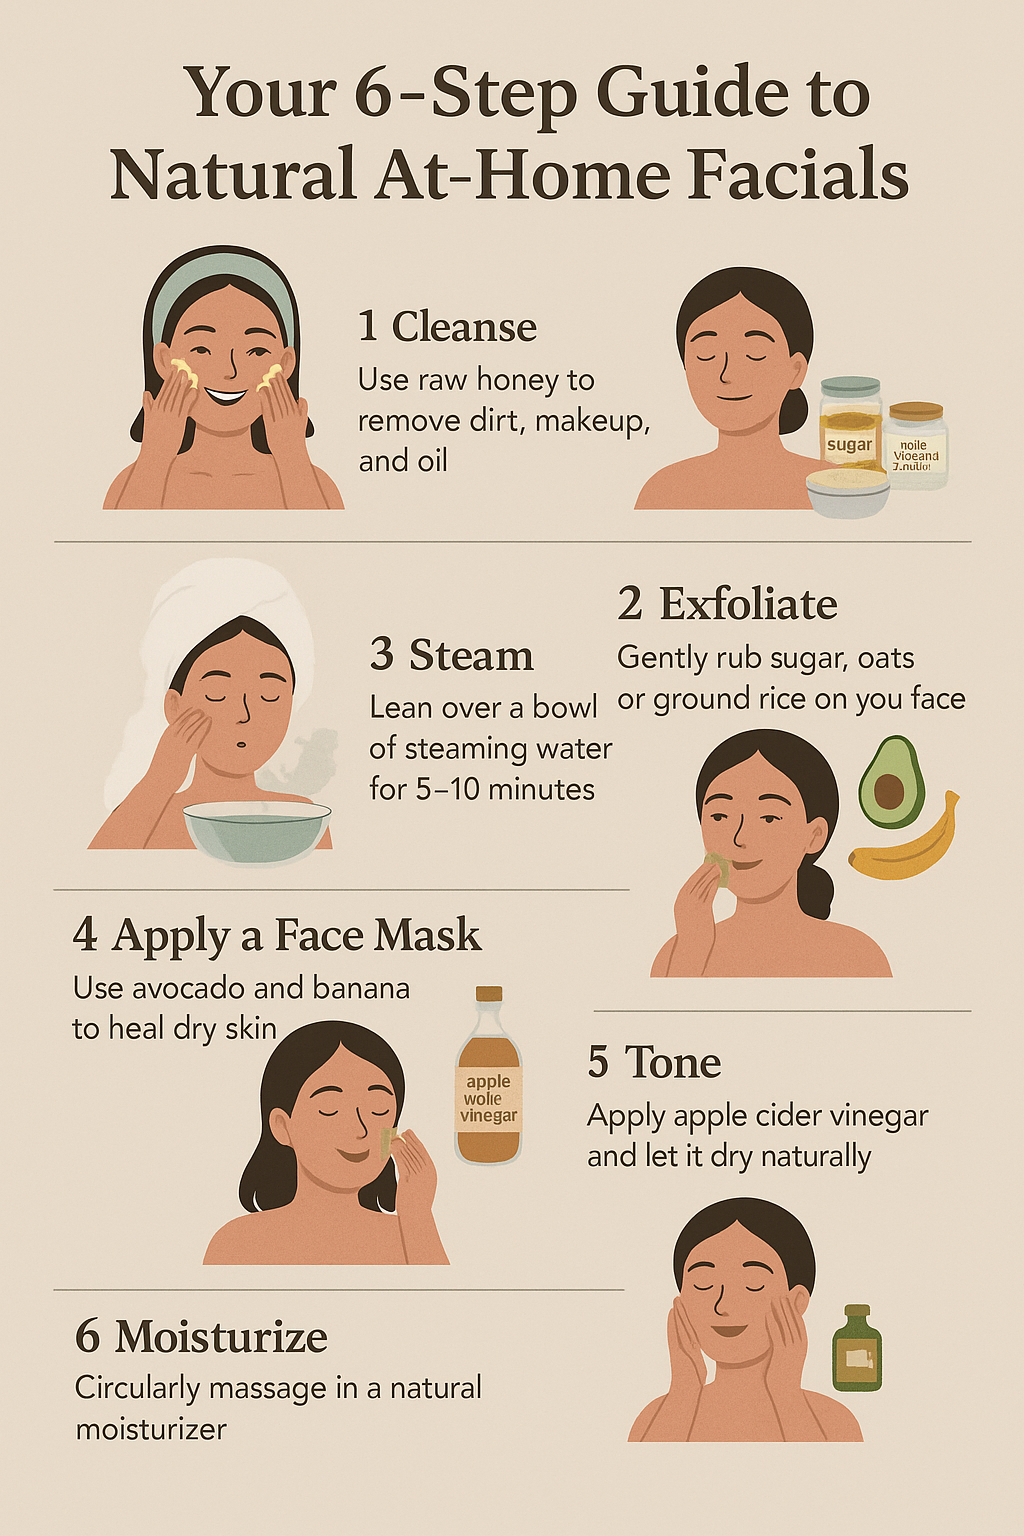
Your 6-Step Guide to Natural At-Home Facials
Let’s be honest — life is stressful, your skin knows it, and those pricey spa facials? They drain your wallet faster than your pores clog after a fried food binge. But here’s the good news: you can recreate that spa-like experience in the comfort of your own home, using simple natural ingredients hiding in your kitchen. This isn’t just about saving money — it’s about giving your skin the same love (if not better) with a DIY at-home facial that’s chemical-free, budget-friendly, and dermatologist-approved in principle.
Regular facials aren’t just vanity — they are crucial for flushing out toxins, promoting skin regeneration, restoring elasticity, reducing acne, and creating that radiant “I woke up like this” glow. In fact, skin experts (entities: dermatologists, estheticians) often emphasize that facials done consistently can slow down premature aging while boosting your self-care routine.
So, if you’re ready to experience a restorative home facial with eco-friendly, organic skincare ingredients, let’s break it down into these six simple yet powerful steps.
Step 1: Cleanse
Think of this as the “reset button” for your face. Cleansing is where it all begins, and skipping it is like trying to cook in a dirty pan.
To start, dampen your face with warm water (helps open pores gently). Then apply a pea-sized amount of raw honey and massage in small circular motions. Not only does honey act as a natural humectant (locking in moisture), but it’s also a gentle antibacterial powerhouse that suits all skin types (oily, dry, sensitive, combination).
For a richer cleanse, try oil cleansing with olive oil or coconut oil, especially if you wear heavy makeup. These oils dissolve impurities without stripping your skin barrier, making them perfect for dry or aging skin.
Step 2: Exfoliate
Here’s the deal: if you don’t exfoliate, your pores clog like rush-hour traffic. Dead skin cells pile up, preventing your glowing skin from making its grand entrance.
DIY exfoliation is simple. Take sugar, oats, or ground rice, mix it with honey, olive oil, or milk, and apply it with gentle circular motions. This removes dead skin cells, boosts circulation, and prepares your skin for the nourishing steps ahead.
Step 3: Steam
If cleansing is the reset button, steaming is the “unlock” feature. The warm vapor opens pores, loosens dirt, and relaxes your skin like a mini sauna session.
Simply boil some water, pour it into a bowl, add herbs or essential oils (lavender, basil, chamomile, bay leaves), and let the vapor work its magic for 5–10 minutes.
Step 4: Apply a Face Mask
This is where the real transformation happens — masks are the superheroes of skincare.
Popular DIY Natural Masks:
- Avocado + Banana → Nourishes cracked, dry skin with healthy fats and vitamins.
- Turmeric + Honey → Antibacterial combo that helps fight acne.
- Greek Yogurt + Oats → Rich in probiotics, calming for redness.
- Clay + Apple Cider Vinegar → Detoxifies oily, acne-prone skin.
Apply a thin layer, leave for 10–15 minutes, then rinse with cool water.
Step 5: Tone
If facials were a story, this is the plot twist nobody talks about. Most people skip toner — big mistake.
Mix apple cider vinegar with water (1:2 ratio) and swipe across your skin using a cotton pad. This balances skin’s pH, seals pores, reduces redness, and prepares your skin for moisturizing.
Step 6: Moisturize
Without moisture, your face is like a desert after the rain — dry, cracked, and begging for relief.
Massage in coconut oil, aloe vera gel, or olive oil using upward circular motions. This doesn’t just hydrate, it also improves blood circulation and keeps skin soft, elastic, and radiant.
For oily or acne-prone skin, go lighter with aloe vera gel or non-comedogenic oils. For aging skin, add a drop of vitamin E oil or hyaluronic acid serum.
Bonus Tips for a Spa-Like Experience
- Light a candle, play calming music, and treat this like mindful self-care, not just skincare.
- Drink green tea or lemon water during your facial for an inside-out detox.
- Keep a jade roller or gua sha tool handy for massage and lymphatic drainage.
Final Thoughts
A natural at-home facial is more than just a skincare routine — it’s an act of self-love, wellness, and beauty care rolled into one holistic ritual. By following these six steps, you’re not only saving money but also ensuring your skin gets the benefits of natural ingredients without the harsh chemicals found in commercial products.
Remember: glowing skin is not about perfection — it’s about consistency. Start with this 6-step DIY facial routine once a week, and watch your skin detoxify, brighten, and rejuvenate naturally.
FAQs (Frequently Asked Questions)
You can do a natural at-home facial once a week. Over-exfoliating or masking too often can cause dryness or irritation, especially for sensitive skin types. A weekly routine keeps your skin detoxified, balanced, and glowing without overwhelming it.
Yes, but with adjustments. Oily or acne-prone skin benefits from ingredients like turmeric, clay, or tea tree oil, while dry skin needs avocado, honey, or yogurt masks. If you have very sensitive skin, stick to gentle options like oats and rose water. Always do a patch test first.
Some of the best natural ingredients for a radiant glow include honey (hydrating), turmeric (brightening), aloe vera (soothing), avocado (nourishing), and rose water (toning). These ingredients are rich in antioxidants and vitamins, making them perfect for a DIY facial routine.
Steaming helps open pores and flush out toxins, but if overdone, it can lead to irritation or dryness. Limit steaming to 5–10 minutes once a week, and always follow with a mask, toner, and moisturizer to restore hydration and seal pores.
A DIY facial uses natural, affordable ingredients you already have at home, while a professional facial often includes advanced treatments like microdermabrasion or chemical peels. DIY facials are budget-friendly, eco-conscious, and great for weekly self-care, but professional facials may give deeper results for specific skin concerns.